Campagnolo ERGO levers can work with a SHIMano drivetrain, mechs and cassette. In an earlier post here, I showed some photos of a bike that I had converted to Shimergo. Now I'm going to explain how I did it. Here's a photo of the bike as it was originally. The brake levers are cheap and nasty.
 The plan was to replace the brake levers and down tube shifters with Campagnolo Ergo levers (Veloce 10 QS Ergo Levers, from around 2009 vintage). The following links are essential reading:
The CTC's Chris Juden on the subject: http://www.ctc.org.uk/desktopdefault.aspx?tabid=3946
CX Magazine on it: http://cxmagazine.com/shimano-campagnol ... patibility
10spd, 8spd success story: http://bikesarethesolution.wordpress.co ... onversion/
Original set up was as follows:
Cassette: Shimano 9 speed, 12-23
Rear mech: Shimano Tiagra
Front mech: Campag Mirage
D/T Levers: Shimano Dura ace
Chainset: Stronglight Impact Triple 28-38-48
According to the above links, the lever swap should work with a little trick to play on the rear mech, namely, the cable attachment bolt washer to be spun round - or "hubbubed".
There's a lot more writing out there, but the above three really convinced me. Plus I saw a forum posting somewhere in which a cyclocross racer reported a season's worth of racing using 10spd Campy shifters on 9spd Shimano with hubbub. That clinched it for me!

Old faithful Shimano Dura Ace down tube levers (9 speed indexed). I'll end up removing these (gulp!)
 These cheepo brake levers are going to go too. I'll be happy about that!
 First step is to take the old bar tape and levers off.
 New 10 Speed Campy levers on. I needed to buy a Torx T25 tool for the main lever clamp bolt. The Veloce levers feel superb in the hand, almost perfectly shaped hoods.

Cable housing fitted for brake and gears, taped down ready for handlebar tape.
 The old down tube levers were replaced with Campagnolo resin cable stops. Although inexpensive, these turned out to be simply brilliant. So easy to adjust, even while riding.

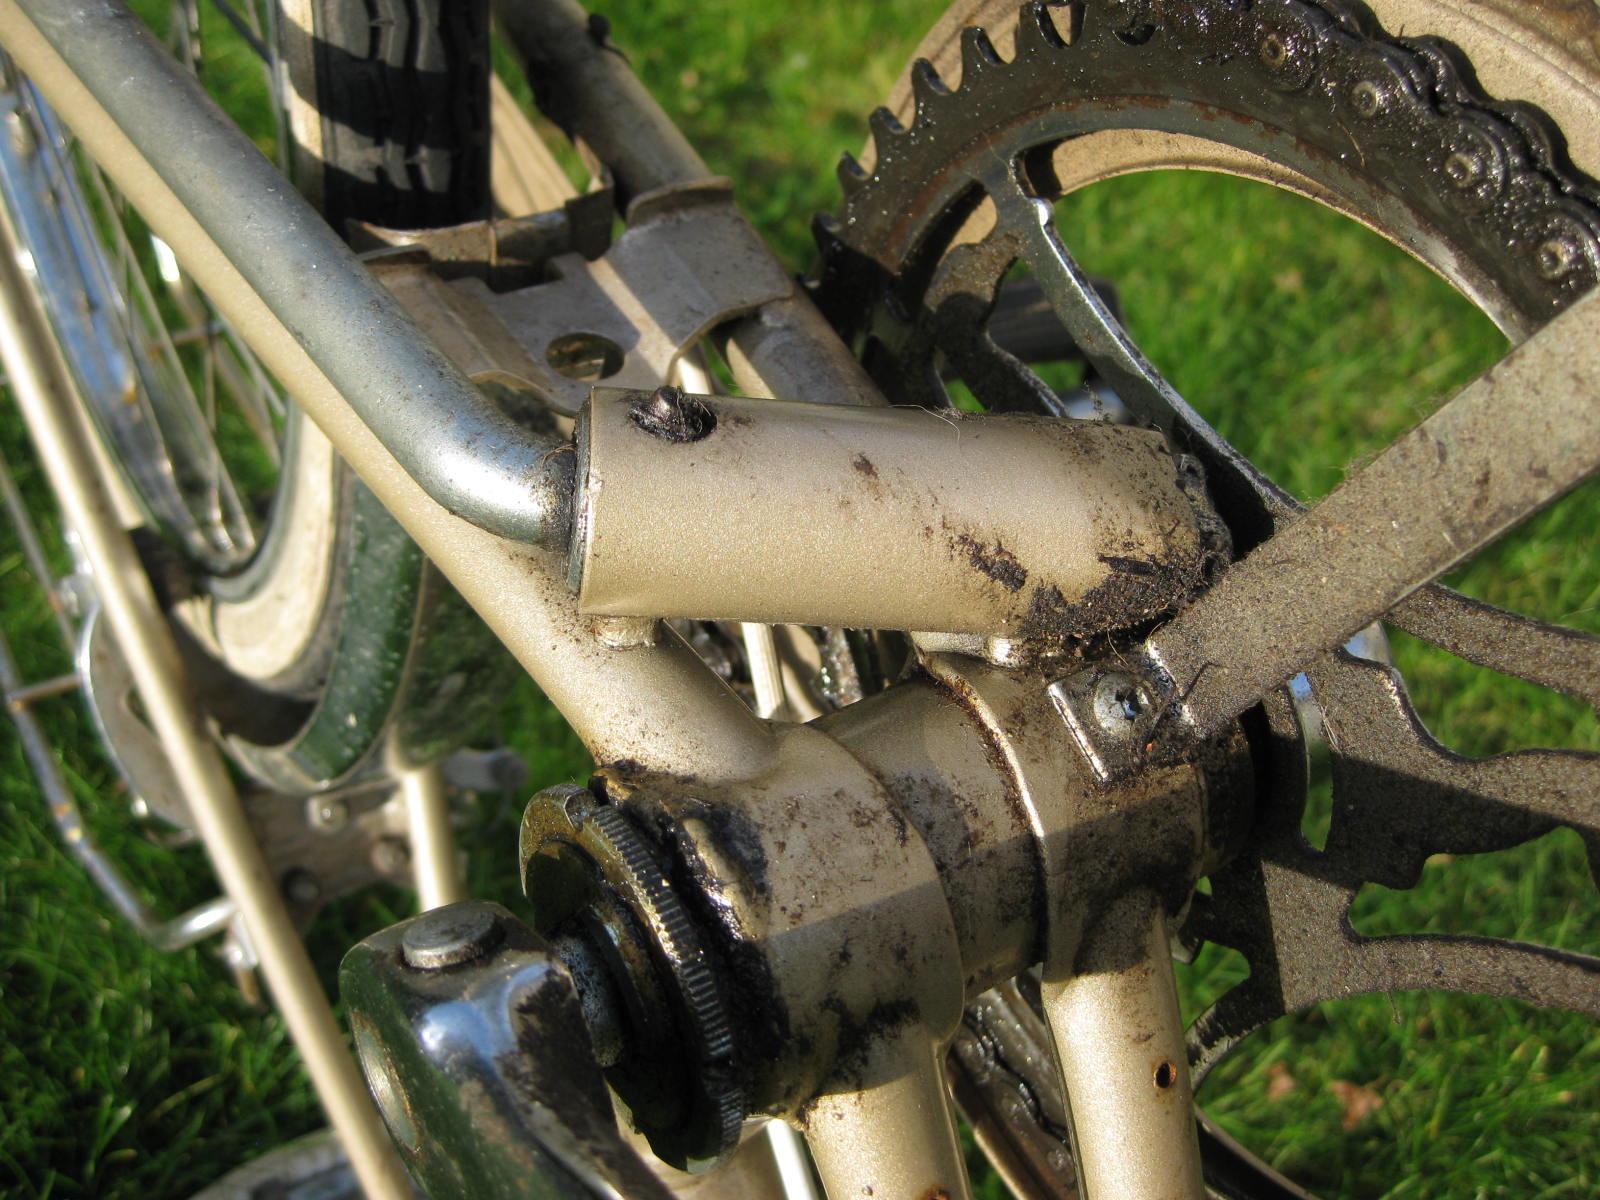
This is the hubbub clamping arrangement. All you do is rotate the clamp hook, run the cable over the hook, and tighten the bolt as shown. Dead easy.

Swanky new bar tape. Now, to my total amazement, both the new levers worked beautifully with NO adjustment needed at all. After a few days riding, I had to adjust some cable tension from the down tube cable stops, but that was it. I believe in Shimergo now!
 Campagnolo levers added a touch of modern class to a good ol' Reynolds 531C road bike. Apart from being able to change gear without moving hands from the bars, another benefit was improved braking performance.
 The plan was to replace the brake levers and down tube shifters with Campagnolo Ergo levers (Veloce 10 QS Ergo Levers, from around 2009 vintage). The following links are essential reading:
The CTC's Chris Juden on the subject: http://www.ctc.org.uk/desktopdefault.aspx?tabid=3946
CX Magazine on it: http://cxmagazine.com/shimano-campagnol ... patibility
10spd, 8spd success story: http://bikesarethesolution.wordpress.co ... onversion/
Original set up was as follows:
Cassette: Shimano 9 speed, 12-23
Rear mech: Shimano Tiagra
Front mech: Campag Mirage
D/T Levers: Shimano Dura ace
Chainset: Stronglight Impact Triple 28-38-48
According to the above links, the lever swap should work with a little trick to play on the rear mech, namely, the cable attachment bolt washer to be spun round - or "hubbubed".
There's a lot more writing out there, but the above three really convinced me. Plus I saw a forum posting somewhere in which a cyclocross racer reported a season's worth of racing using 10spd Campy shifters on 9spd Shimano with hubbub. That clinched it for me!

Old faithful Shimano Dura Ace down tube levers (9 speed indexed). I'll end up removing these (gulp!)
 These cheepo brake levers are going to go too. I'll be happy about that!
 First step is to take the old bar tape and levers off.
 New 10 Speed Campy levers on. I needed to buy a Torx T25 tool for the main lever clamp bolt. The Veloce levers feel superb in the hand, almost perfectly shaped hoods.
Cable housing fitted for brake and gears, taped down ready for handlebar tape.
 The old down tube levers were replaced with Campagnolo resin cable stops. Although inexpensive, these turned out to be simply brilliant. So easy to adjust, even while riding.
This is the hubbub clamping arrangement. All you do is rotate the clamp hook, run the cable over the hook, and tighten the bolt as shown. Dead easy.

Swanky new bar tape. Now, to my total amazement, both the new levers worked beautifully with NO adjustment needed at all. After a few days riding, I had to adjust some cable tension from the down tube cable stops, but that was it. I believe in Shimergo now!